“The preLaunchTask ‘C/C++:gcc.exe build active file’ terminated with exit code -1” error in Visual Studio Code (VS Code) is a common issue faced by C++ developers. This error occurs when the integrated terminal in VS Code cannot locate the GCC compiler, which is required to build, run, and debug C++ programs.
In this article, we will discuss all the possible reasons which can cause this issue, and the ways to solve them. We’re confident that by the end of this article, you’ll have solved this error in your computer system.
Table of Contents
Solving the “the preLaunchTask ‘C/C++:gcc.exe build active file’ terminated with exit code -1” Error In VS Code
As discussed earlier, this problem occurs when the terminal inside VS code fails to run the GCC compiler when trying to build your program.
However, there could be multiple reasons why VS code isn’t able to locate or run the GCC compiler. We’ll discuss all of them and provide solutions to them.
The steps to detect and solve the error are given below.
Step 1: Check Whether GCC Is Installed In Your System
This is to ensure that the compiler responsible for compiling your C++ code, is actually installed in your system.
In command prompt, power shell, or any other terminal installed in your system, type gcc –version. If GCC is installed correctly, its version number will be displayed on the screen, as shown below.

Otherwise, it means that GCC is not installed in your system properly, and you need to install GCC first, from here.
Step 2: Check GCC Installation Path In Environment Variables
If the gcc -version command doesn’t work on your terminal even after installing GCC, you need to check whether the environment variable is correctly set up for GCC.
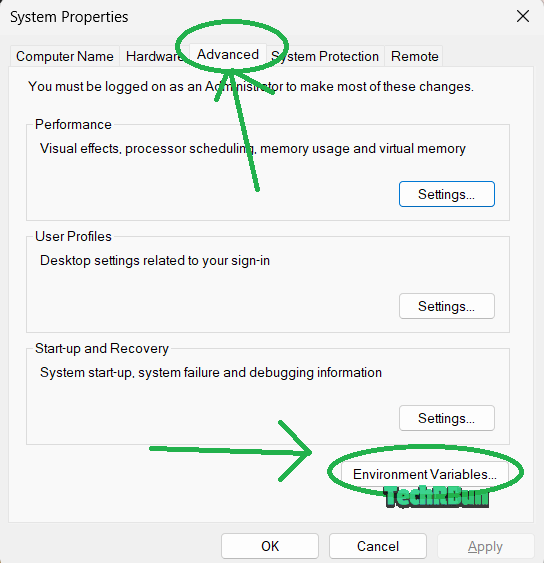
To check the same, press CTRL + R to open the Run box, type sysdm.cpl, and hit Enter.
The System Properties window will open. Go to the Advanced tab, and click on the Environment Variables button, as shown in the picture below.
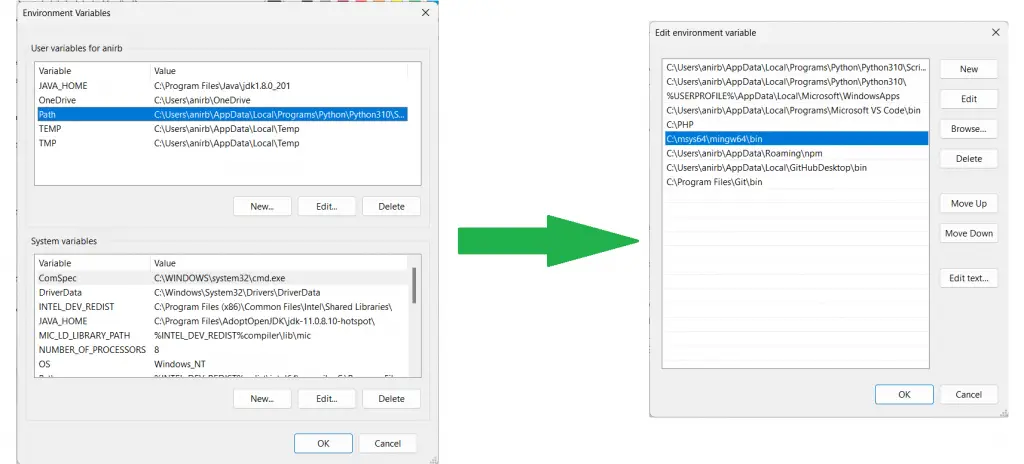
The list of user and system variables will appear. Now, select the Path variable from under user variables, and double-click on it. Make sure the location of your GCC compiler’s executable is mentioned there. If not, add it there. In the picture given below, we’ve used mingw64.
Step 3: Check If C/C++ Extension For VS Code Is Properly Installed
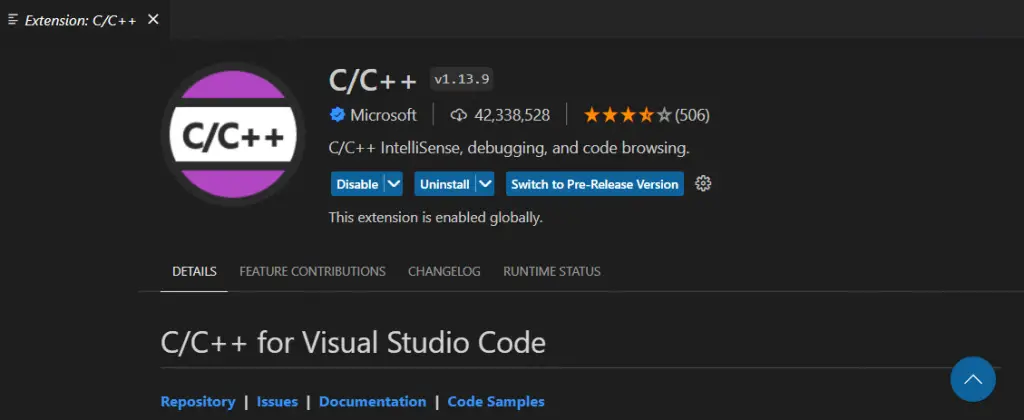
The C/C++ Extension for VS Code configures the GCC environment for programs to be built and run in VS Code smoothly.
Go to the extensions tab in VS Code (CTRL + SHIFT + X), type “C/C++”, and install the extension if not already installed.
Step 4: Check If The Extension Is Configured Properly
Press CTRL+SHIFT+P inside VS Code to launch the command palette, and type “c/c++: edit configurations (ui)“.
Select the option shown in the picture given below, and hit Enter.

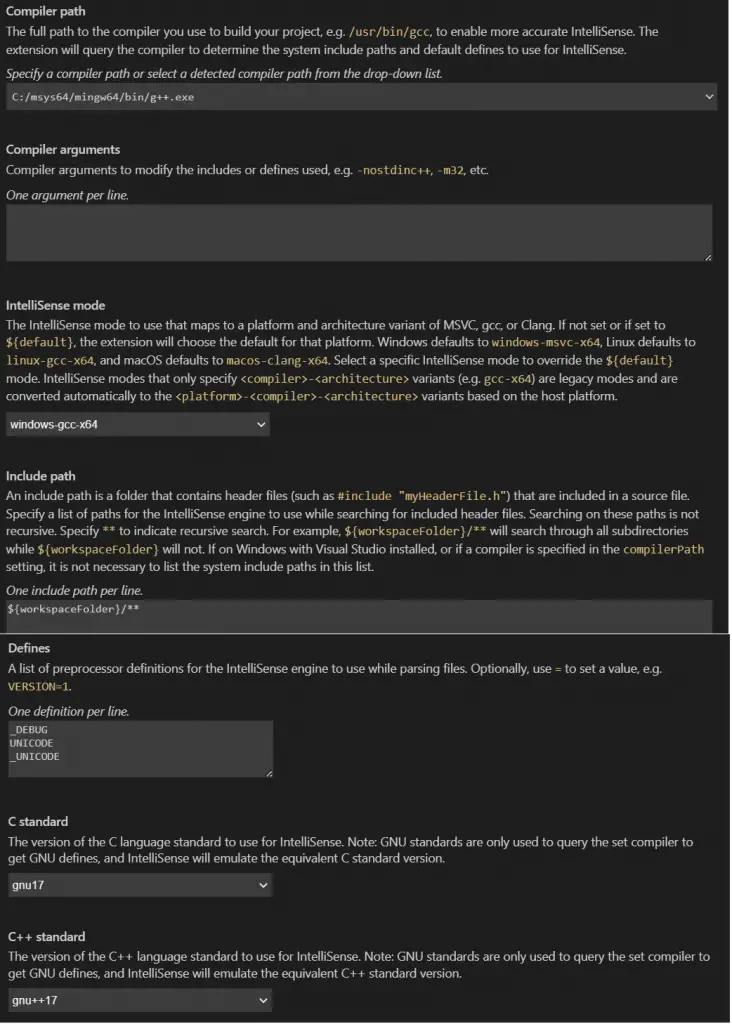
Make sure that all the values in your configuration match the values given below.
- Compiler path: This varies based on your GCC installation path and operating system. Double-check to make sure that the location mentioned in your compiler path is correct or not. If not, update it with the right location of the gcc executable.
- IntelliSense mode: As shown in the image below.
- Include path: ${workspaceFolder}/**
- Defines: As shown in the given image.
- C standard: gnu17
- C++ standard: gnu++ 17
Alternative Solution
We’d like to thank @seungxx3051 on YouTube for sharing the solution mentioned below.
If anyone is still having this issue, kindly follow the steps given below:
- From the “Edit Configurations (UI)” access the “c_cpp_properties.json” file and change the “compilerPath” to g++.exe instead of gcc.exe.
- In the folder of your cpp file you’ll find a “.vscode” folder. Open the file “tasks.json” inside it.
- Change the “command” path to g++.exe instead of gcc.exe
I hope that this article was helpful in resolving the “The preLaunchTask ‘C/C++:gcc.exe build active file’ terminated with exit code -1” error in Visual Studio Code (VS Code). By following the steps outlined in the article, you should be able to get back to building and running C++ programs in VS Code without any further issues.
If you still encounter any issues or have further questions, please feel free to comment down below, and I’ll try my best to help you out.


Thank you very much! Changing the C and C++ standards, to the ones shown by you in the article, fixed the problem for me.
I still have the error even after doing everything on this list. Can anyone help me locate the exact place of error?
Hi Elliot, I would suggest you to try out the alternative solution, recently updated in the article.
still not working
Hi Elliot, I would suggest you to try out the alternative solution, recently updated in the article.