Hey there, fellow Roomba owners! If you’ve ever encountered the puzzling blinking/flashing or pulsing orange light on your iRobot Roomba, worry not—I’ve got you covered.
As someone who has experienced this issue firsthand, I understand the frustration it can cause. That’s why I’ve put together this comprehensive guide to help you troubleshoot and fix the problem, just like I did.
Let’s start by briefly addressing the reason behind that blinking or pulsing orange light that can send us into a panic.
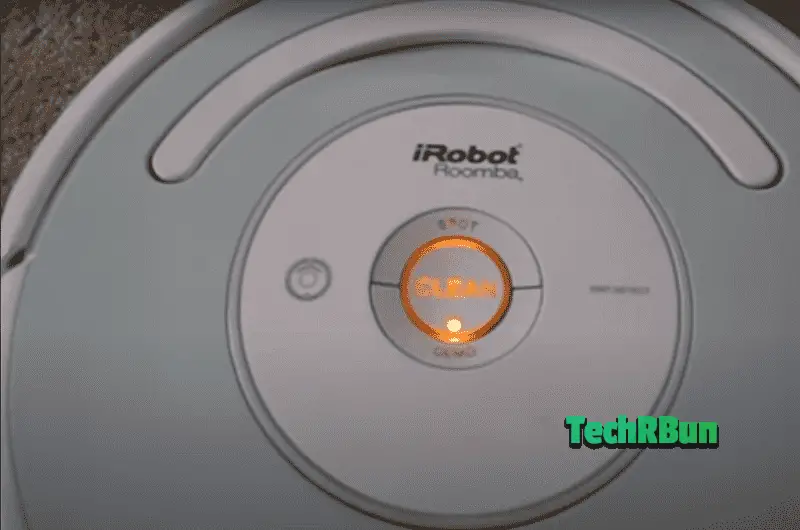
The flashing/blinking orange light is a sign that Roomba has entered the 16-hour refresh charging cycle. When the battery level of the robot drops to an extreme low, it triggers this special charging process to recalibrate and refresh the battery’s performance.
Initially, this may leave us scratching our heads, but fear not—it’s a built-in feature to optimize our Roomba’s overall functionality.
The purpose of this article is simple: to guide you through the steps of fixing the flashing/blinking or pulsing orange light issue on your iRobot Roomba. Together, we’ll explore the common causes that can lead to this situation, and I’ll share with you the troubleshooting techniques I’ve personally used to successfully resolve it.
By following these steps carefully, you’ll have your Roomba up and running smoothly again, ready to tackle your cleaning tasks with gusto.
Throughout this guide, I’ll be sharing my personal experiences and insights as a Roomba owner. I’ve encountered various obstacles and discovered practical solutions along the way. Whether you’re a seasoned Roomba aficionado or new to the world of robotic vacuums, I promise you’ll find the information and guidance you need to troubleshoot and overcome the blinking or pulsing orange light issue.
So, let’s begin the troubleshooting journey to restore our iRobot Roombas to their prime cleaning condition. With the solutions provided in this guide, you’ll be back to enjoying uninterrupted cleaning sessions in no time. Trust me, I’ve been there, and I know how satisfying it is to see that trusty Roomba back in action.
Let’s roll up our sleeves and dive into the nitty-gritty of fixing the blinking or pulsing orange light on our iRobot Roombas. Together, we’ll conquer this challenge and reclaim the efficiency and convenience we’ve come to love from our beloved cleaning companion!
Table of Contents
- 1 Understanding the Blinking/Pulsing Orange Light
- 2 Steps To Troubleshoot The Orange Blinking Light In iRobot Roomba
- 3 Advanced Solutions and Maintenance Tips
- 4 Contacting iRobot Support
Understanding the Blinking/Pulsing Orange Light
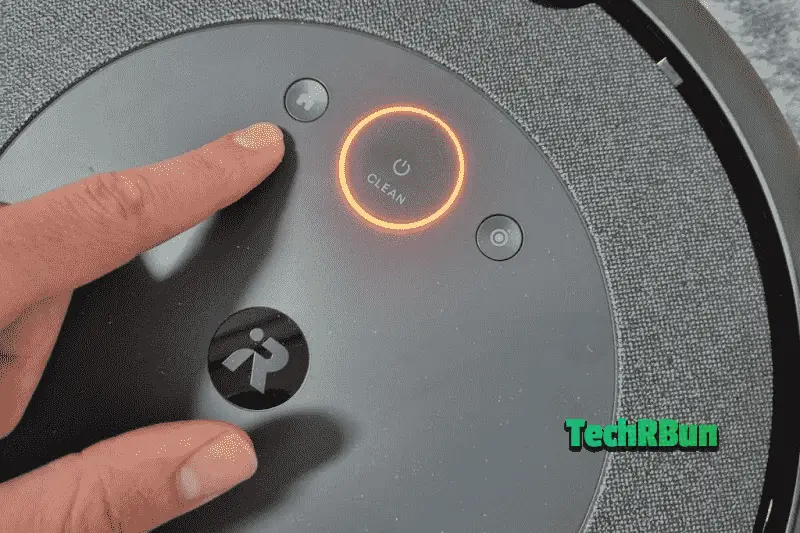
Ah, the blinking or pulsing orange light on our iRobot Roomba—it can be a perplexing sight, can’t it? As someone who has encountered it before, let me clarify what this indicator signifies. The pulsing orange light serves as a signal, indicating that our Roomba has entered a 16-hour charging refresh cycle due to an extremely low battery.
But what exactly does this mean? And how to fix it?
When the battery level of our Roomba drops to a critically low point, it triggers the 16-hour charging refresh cycle. This cycle is designed to optimize the battery’s performance by thoroughly recharging and recalibrating it. It’s an essential process to ensure our Roomba continues to operate efficiently.
While the pulsing orange light primarily indicates the 16-hour charging refresh cycle, it’s worth noting that other factors could contribute to the low battery level. For instance, dirty charging contacts on the Roomba or a malfunctioning charging dock/home base can hinder proper charging, resulting in extreme low battery levels.
Therefore, it’s advisable to inspect and look for problems charging contacts on both the Roomba and the charging dock/home base to prevent future occurrences of this issue.
Understanding the purpose of the pulsing orange light and the charging refresh cycle should alleviate any concerns. Instead of worrying about a malfunction, we can rest assured that our Roomba is simply undergoing a necessary process to maintain its battery health.
However, it’s still important to address potential charging issues like dirty charging contacts or a malfunctioning charging dock/home base, as these can contribute to the low battery level.
In the subsequent sections, we will delve into troubleshooting techniques and solutions for other potential issues related to the orange light on your iRobot Roomba.
This will include steps to clean the charging contacts and troubleshoot the charging dock/home base if needed. By resolving these underlying factors, we can ensure that our Roombas remain reliable companions in keeping our homes clean and tidy.
Steps To Troubleshoot The Orange Blinking Light In iRobot Roomba
In this section, I’ll provide you with detailed step-by-step instructions to troubleshoot and resolve this issue. Let’s begin with some basic troubleshooting steps and then move on to more specific solutions.
Step 1: Check the Power Source
- Ensure that your Roomba is connected to a functional power source.
- Verify that the power cord is securely plugged into the charging dock.
- Confirm that the charging dock is plugged into a working power outlet.
- Check for any issues with the power supply, such as a tripped circuit breaker or a blown fuse.
Step 2: Ensure Proper Connections
- Inspect the connections between your Roomba and the charging dock.
- Ensure that the charging contacts on your Roomba are clean and free from dirt or debris.
- Similarly, check the contacts on the charging dock and clean them if necessary.
- Make sure there is proper contact between your Roomba and the charging dock for efficient charging.
Step 3: Allow Sufficient Charging Time

- If your Roomba has an extremely low battery, it may require an extended charging period to complete the 16-hour refresh cycle.
- Plug in your Roomba and ensure the power is turned on.
- Let your Roomba charge continuously for a full 16 hours without interruption.
- Be patient and avoid interrupting the charging process during this time.
If the above steps didn’t resolve the issue, let’s move on to more specific troubleshooting techniques.
Step 4: Reset or Replace the Battery
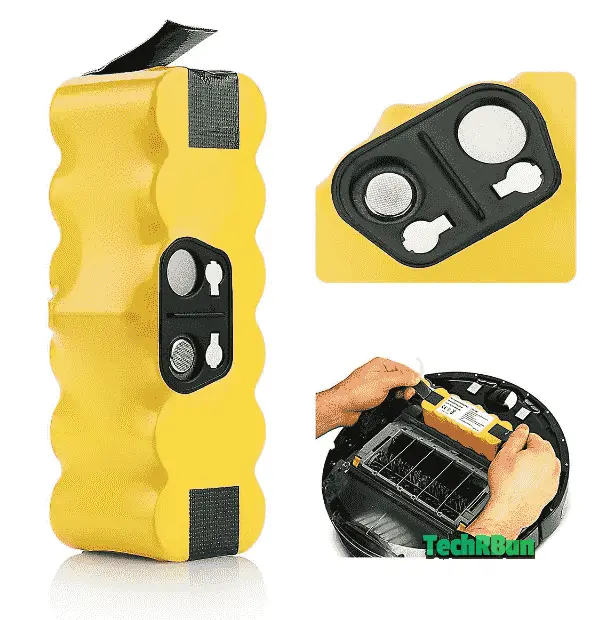
- To reset the battery, remove it from your Roomba.
- Wait for a few minutes before reinserting the battery.
- This reset may help recalibrate the battery.
- If the problem persists, consider replacing the battery with a new one.
Step 5: Interpret and Resolve Error Codes
- If your Roomba displays a specific error code along with the orange light, consult the user manual or visit the iRobot website for a list of error codes and their solutions.
- Identify the specific error code indicated on your Roomba.
- Follow the recommended steps provided to address the error code.
Step 6: Clean the Roomba’s Cleaning System
- Inspect the brushes, side wheels, and vacuum inlet for any dirt, hair, or debris buildup.
- Carefully remove any obstructions using a cleaning tool or a pair of scissors.
- Ensure regular maintenance of the cleaning system to prevent clogs and maintain optimal performance.
Step 7: Perform a Full System Reset
- If the previous steps haven’t resolved the issue, performing a full system reset may help.
- Refer to your Roomba’s user manual or visit the iRobot website for detailed instructions specific to your model.
- Follow the step-by-step instructions provided to perform a full system reset.
- This will restore your Roomba to its factory settings and clear any temporary glitches.
By diligently following these troubleshooting steps, you should be able to identify and resolve the underlying causes of the blinking or pulsing orange light on your iRobot Roomba.
Remember to be patient and thorough in your approach. Regular maintenance and proper troubleshooting techniques will ensure that your Roomba continues to provide efficient cleaning performance.
Advanced Solutions and Maintenance Tips
If the issue persists despite your best efforts, it’s time to explore advanced troubleshooting techniques.
In this section, we will delve into detailed step-by-step instructions to address some more underlying faults that could cause the problem with the flashing orange light.
Additionally, we’ll discuss essential maintenance tips to optimize your Roomba’s performance and longevity.
Test and Replace the Power Supply or Charging Dock
If there’s issue with either the power supply or the charging dock, your Roomba with have trouble charging itself, which in turn causes its battery to get to critically low levels and trigger the 16 hour emergency charging refresh.
Thus, it’s a good idea to investigate both of them and replace them if found faulty.
Power Supply:
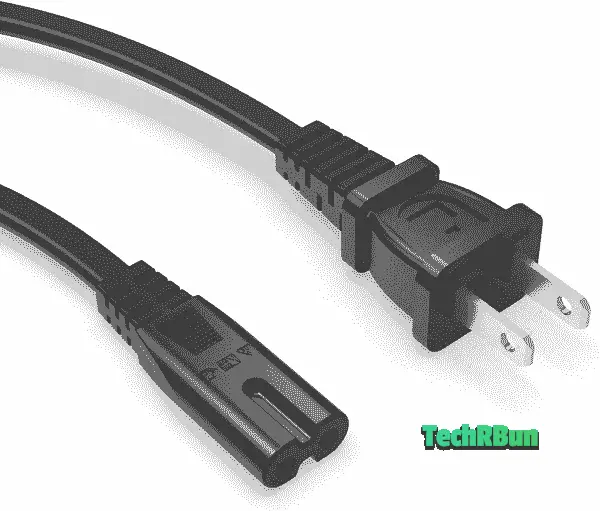
- Try using a different power outlet to ensure the outlet is not causing the issue.
- If possible, borrow or purchase a new power supply that is compatible with your Roomba model.
- Plug in the new power supply and observe if the orange light issue persists.
- If the new power supply resolves the problem, it indicates a faulty power supply that needs replacement.
Charging Dock:
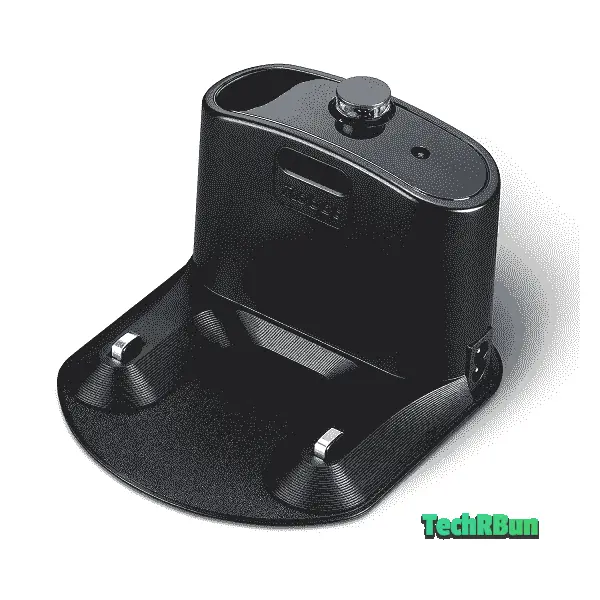
- Clean the charging contacts on both the Roomba and the charging dock using a soft cloth or cotton swab.
- Ensure that the charging dock is positioned on a flat surface and free from obstructions.
- Connect the Roomba to the charging dock and observe if the orange light continues to pulsate.
- If the issue persists, consider borrowing or purchasing a new charging dock that is compatible with your Roomba model.
- Connect the new charging dock and check if the orange light issue is resolved.
Calibrate the Cliff Sensors and Drop Sensors
Accurate navigation is essential for your Roomba to be able to actually reach the homebase for charging from time to time, and prevent critical low battery levels.
Follow these steps to calibrate the cliff sensors and drop sensors:
Cliff Sensors:
- Lift your Roomba and turn it upside down to access the bottom side.
- Locate the cliff sensors, usually positioned towards the front.
- Gently clean the sensors using a soft cloth or compressed air to remove any dust or debris.
- Place your Roomba on a flat surface and press the “Clean” button.
- Observe if the orange light persists or if the Roomba moves normally.
Drop Sensors:
- On the underside of your Roomba, locate the drop sensors, usually positioned near the front wheels.
- Use a soft cloth or compressed air to clean the drop sensors, ensuring they are free from dirt or grime.
- Place your Roomba on a flat surface, away from any potential drop-offs.
- Press the “Clean” button and observe if the Roomba operates without the pulsing orange light.
Regular Maintenance for Optimal Performance
Regular cleaning and maintenance is very important to keep the Roomba functioning properly. Dirt buildups in essential areas could cause it to malfunction and sometimes even prevent it from charging optimally.
Follow these important maintenance tasks:
Cleaning the Filter:
- Remove the filter from your Roomba, following the instructions in the user manual.
- Tap the filter gently to remove any accumulated dirt or debris.
- Rinse the filter under running water to wash away remaining particles.
- Allow the filter to dry completely before reinserting it into your Roomba.
Cleaning the Brushes:
- Remove the brushes from your Roomba, following the instructions in the user manual.
- Use a cleaning tool or your fingers to remove any hair or debris tangled around the brushes.
- Rinse the brushes with water to ensure thorough cleaning.
- Allow the brushes to dry completely before reinstalling them.
Cleaning the Sensors:
- Regularly check and clean the various sensors on your Roomba, such as the optical sensors and cliff sensors.
- Use a soft cloth or compressed air to remove dust or debris from the sensors.
- Clean the charging contacts on both the Roomba and the charging dock regularly to maintain efficient charging.
Firmware Updates
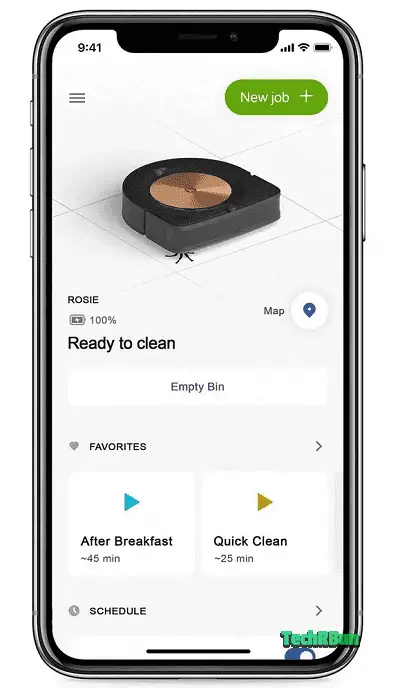
iRobot periodically releases firmware updates to improve the functionality and performance of your Roomba.
It’s crucial to keep your Roomba always updated to the latest version to ensure that there are no bugs in its software that could possibly be creating a false positive to emit the orange light.
Follow these steps to check for and install the latest software version:
- Connect your Roomba to your home Wi-Fi network if it is not already connected.
- Download the iRobot HOME app on your smartphone or tablet.
- Open the app and navigate to the settings for your Roomba.
- Look for the “Firmware Update” or “Software Update” option and select it.
- If an update is available, follow the on-screen instructions to download and install it.
- Ensure that your Roomba remains connected to power and Wi-Fi during the update process.
Regularly updating the firmware ensures that your Roomba benefits from the latest features and improvements, potentially resolving any software-related issues.
By following these detailed advanced troubleshooting techniques and practicing regular maintenance, you can effectively address persistent orange light issues on your iRobot Roomba. Remember to be patient and meticulous throughout the process.
Should you encounter any difficulties or have further concerns, don’t hesitate to reach out to iRobot customer support for personalized assistance.
Contacting iRobot Support
If you have followed all the troubleshooting steps mentioned earlier and the pulsing orange light issue on your iRobot Roomba persists, it is recommended to contact iRobot’s customer support for further assistance.
Their knowledgeable support team can provide personalized guidance to help resolve the problem.
Here’s how you can reach out to iRobot support:
- Phone Support:
- For customers in the United States, you can contact iRobot support at 1-866-747-6268.
- International customers can find the appropriate contact number for their region on iRobot’s official website.
- Email Support:
- If you prefer to communicate via email, you can reach iRobot support by sending an email to [email protected].
When contacting iRobot support, it is helpful to document the troubleshooting steps you have already taken. Be sure to include any error codes you have encountered during the process. This information will assist the support team in understanding the specific issue and providing faster and more accurate assistance.
iRobot’s customer support is dedicated to ensuring customer satisfaction and will work diligently to address any concerns or technical difficulties you may encounter with your Roomba. Feel free to reach out to them for expert guidance and solutions.
Remember to provide them with your Roomba’s model number and any relevant details about your specific situation to facilitate a smoother support process.
In this article, we have explored the common issue of the blinking or pulsing orange light on the iRobot Roomba and provided detailed solutions to address this problem. We began by understanding the significance of the orange light, which indicates that the Roomba has entered the 16-hour charging refresh cycle due to an extremely low battery. However, we also acknowledged that other factors, such as dirty charging contacts or a malfunctioning charging dock, can contribute to improper charging and lead to the low battery issue, that in turn causes the orange light to blink.
Throughout the article, we offered step-by-step instructions for troubleshooting the issue, starting with basic steps like checking the power source and ensuring proper connections. We then progressed to more advanced solutions, including testing and replacing the power supply or charging dock, calibrating the cliff and drop sensors, and performing regular maintenance tasks such as cleaning the filters, brushes, and sensors. We also highlighted the importance of firmware updates to enhance the Roomba’s performance.
If the troubleshooting steps provided in the article do not resolve the issue, we encouraged readers to reach out to iRobot’s customer support for further assistance. We provided the contact information, including phone numbers and email addresses, and suggested documenting the steps already taken and any error codes received for faster support.
By promptly addressing the blinking or pulsing orange light issue, you can ensure optimal performance of your iRobot Roomba. With the solutions provided and the support available, we are confident that you will be able to resolve the issue and continue enjoying the convenience of a fully functional Roomba. Happy cleaning!


